BMW Z3 DIYs
  • |Home|
  • |Mechanical DIYs|
    • Tune-Up
    • Oil Change
    • Crank Case Vent Valve
    • Air Filter
    • Reset Oil Service Light
    • Code Scanning
    • Temperature Sensor
    • Valve Cover Gasket
    • Camshaft Position Sensor
    • Upstream O2/Lambda Sensor
    • Intake Temp Sensor
    • Coil On Plug Conversion
    • Clutch [Writeup]
    • Power Steering Removal
    • Bleeding the Cooling System
    • Seafoaming
    • Bleeding Coolant System
    • Heli Coil [How To]
    • Valve Cover Painting
    • Steering Damper Upgrade
  • |Interior DIYs|
    • Instrament Cluster
    • Seat Bushings
    • Interior Light Bulbs
    • Speakers
    • Interior Door handle Cover
    • Stereo Removal
    • Chrome Ring [Gauge Cluster]
    • Steering Wheel [Upgrade]
    • Push Button Start
    • Console Lock Switch
    • Euro Glove Box and Trim
    • Interior Door Pull
  • |External DIYs|
    • HID kits
    • Fog Light Bulb
    • Headlights
    • Door Handle [Painting]
    • Side Mirror
    • Door Handle Gasket
    • Roundel Removal
  • |Suspension DIYs|
    • Front Struts
    • Rear Shocks
    • Sway Bars
    • Brake and Clutch Bleeding
    • Front Brakes
  • |Comments|
  • |Extras|
    • FAQ
    • Diagnosis
    • Specifications
    • Resources
  • |Blogs|
    • Rough Idle Fix
    • The Race to Autocross

Supplies

Flat Headed Screw Driver
Door Handle Rubber Gaskets:
Left [51218400195]
Right [51218400196]
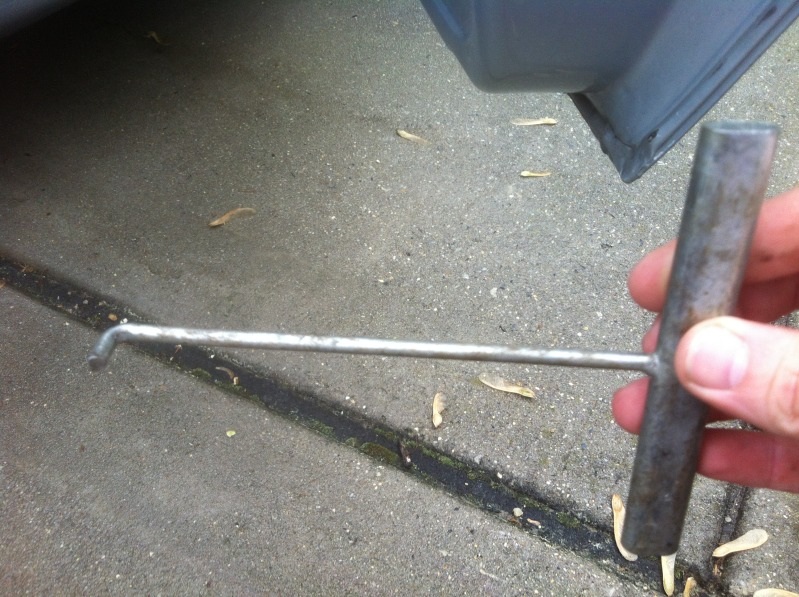
Hook tool\ hex wrench\ Paint can key\ something strong with a hook
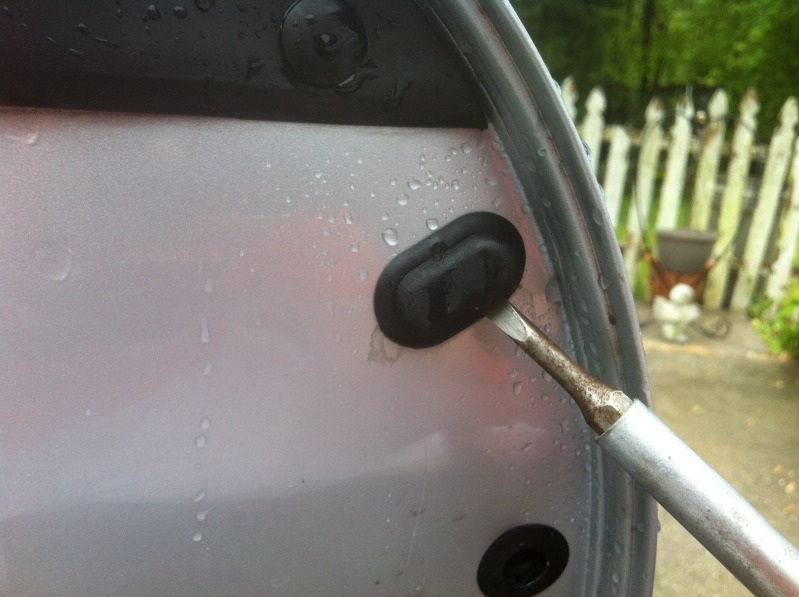
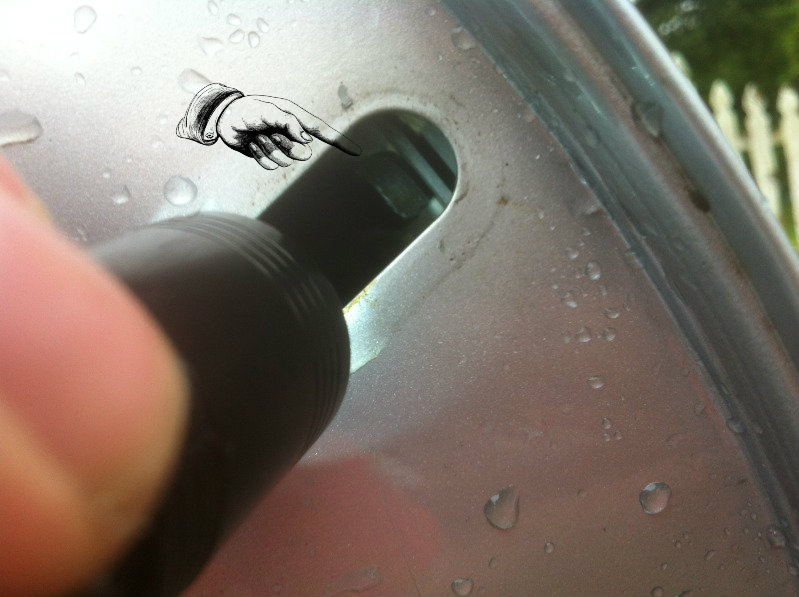


Step 1

Locate the rubber plug and remove it.
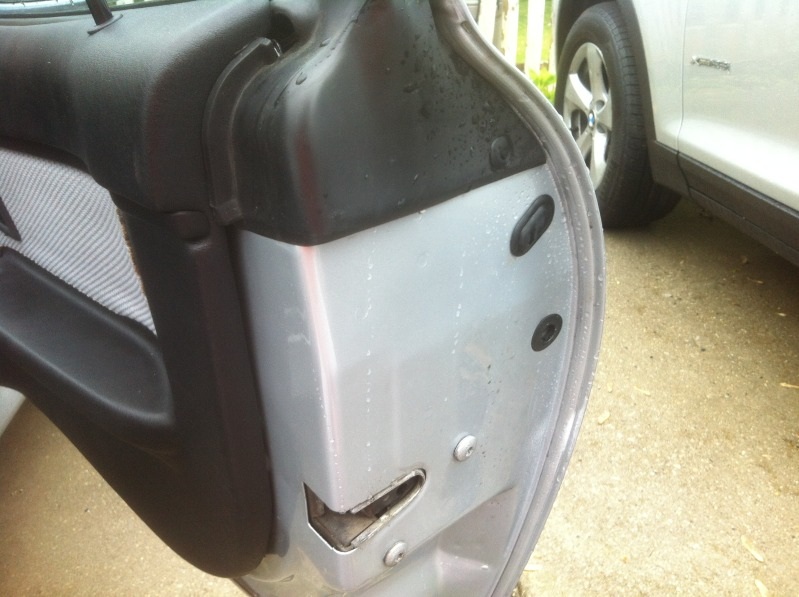
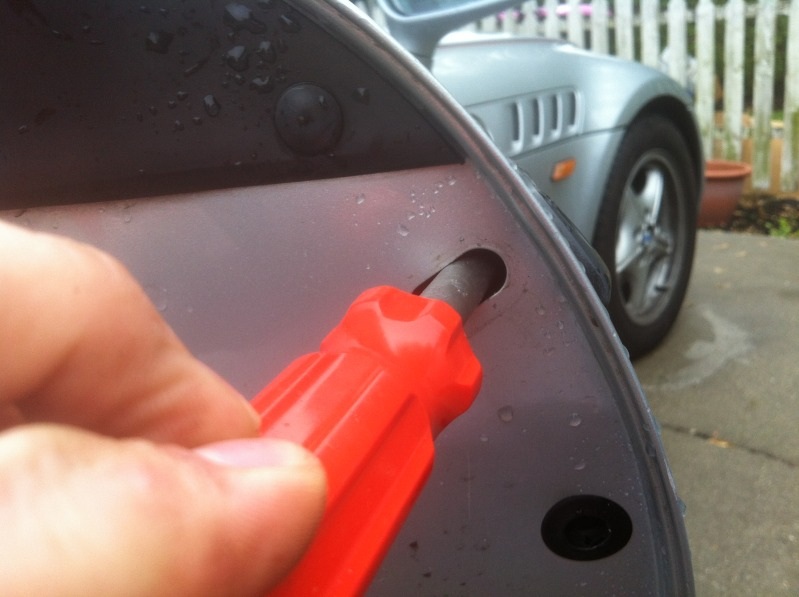
Picture
Picture

Step 2

Locate the Tab that holds the handle cover on. Push the metal tab in with a flat headed screw driver.
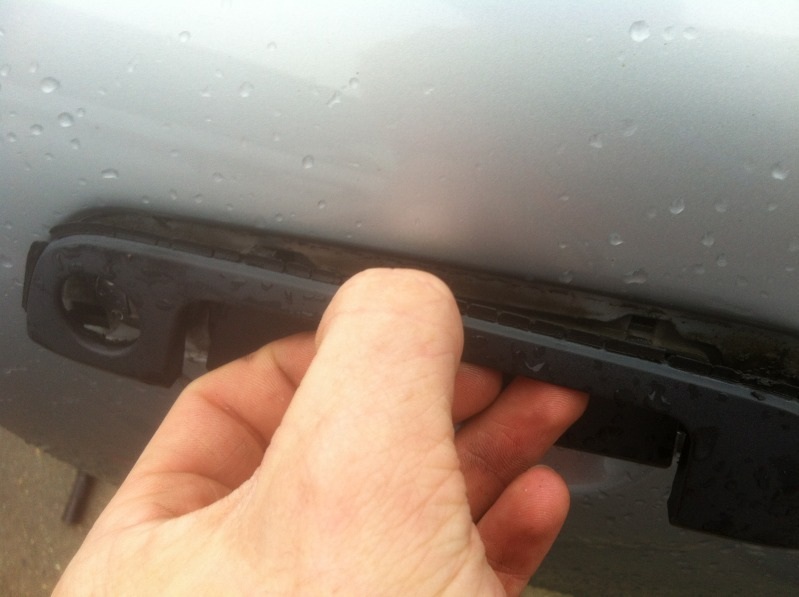
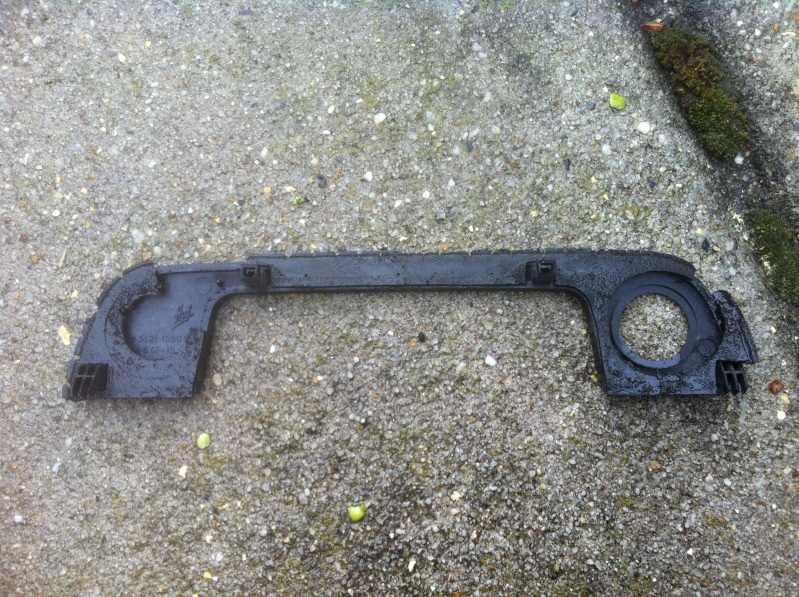
Picture
Picture

Step 3

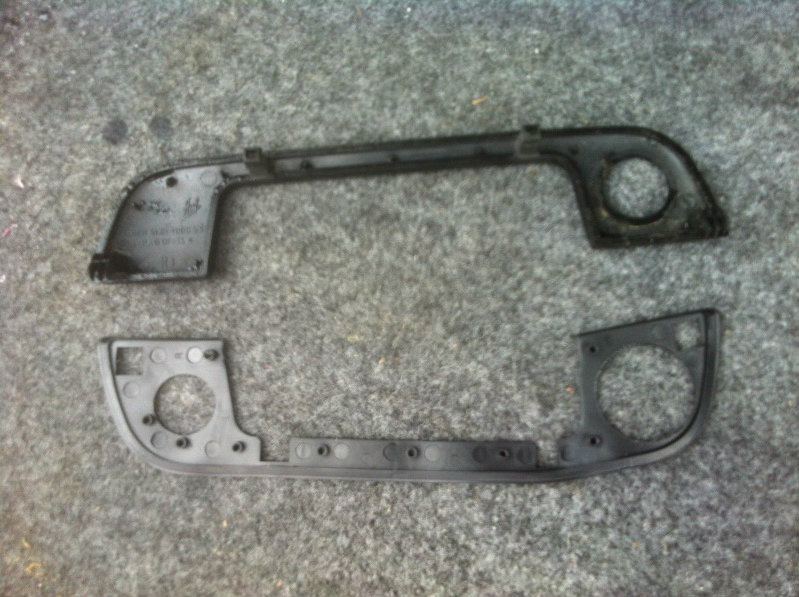
You can now pull off the Door handle. Make sure you remove the old rubber gasket from the rear and wipe the back of the handle clean.
Picture
Picture

Step 4

Line up the nipples on the handle and gasket. Press the gasket on in all the nipple spots, then make sure the gasket is seated around the outside edge of the handle.
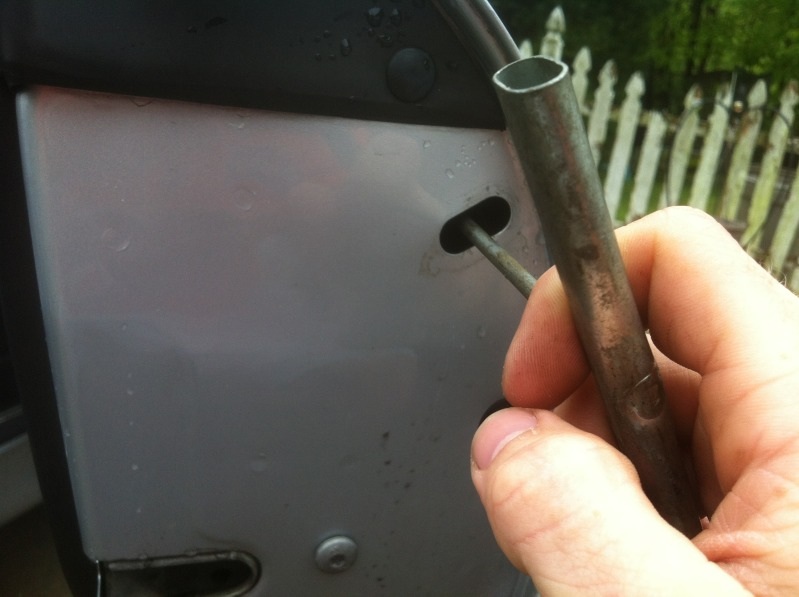
Picture

Step 5

Put the handle back onto the door. Then use your hook tool to pull the tab towards you to lock in the handle
[I use a Hook tool from a trampoline, used to attach springs]
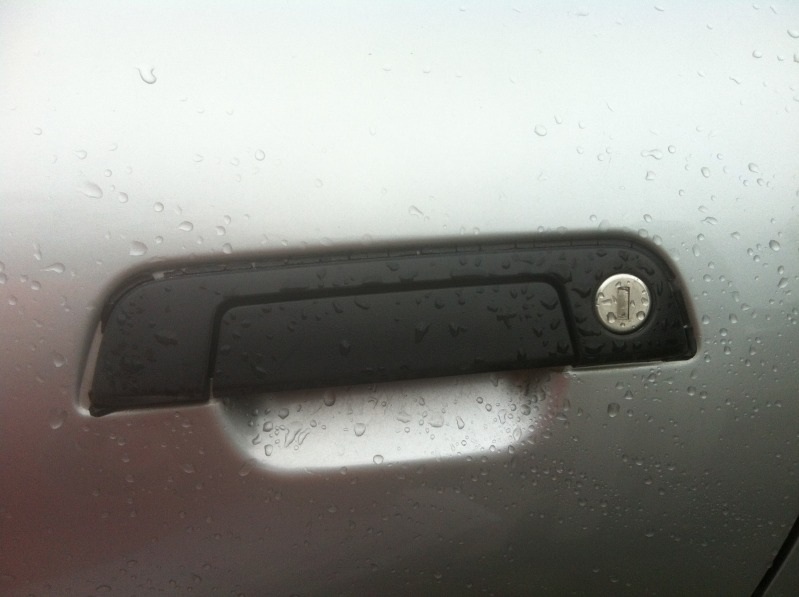
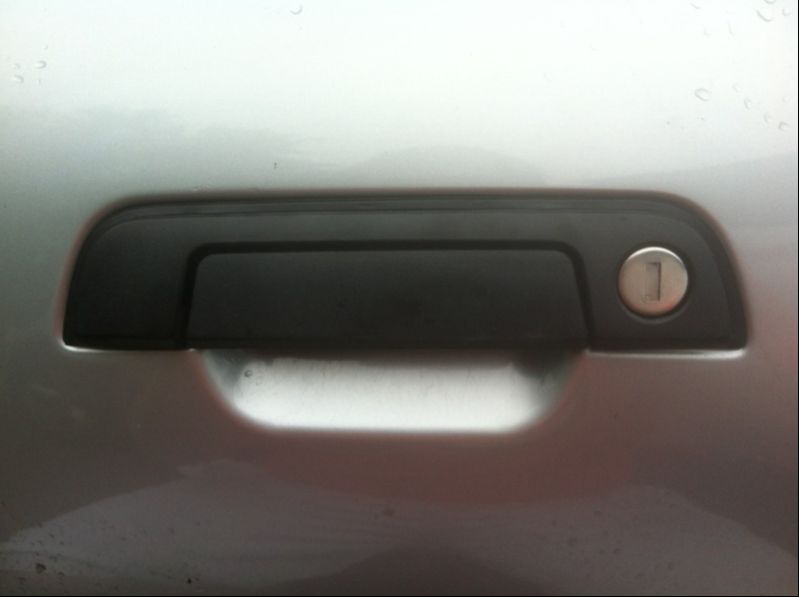
Picture
Picture

Step 6

A Before and After shot.
Picture
Picture
Powered by Create your own unique website with customizable templates.
  • |Home|
  • |Mechanical DIYs|
    • Tune-Up
    • Oil Change
    • Crank Case Vent Valve
    • Air Filter
    • Reset Oil Service Light
    • Code Scanning
    • Temperature Sensor
    • Valve Cover Gasket
    • Camshaft Position Sensor
    • Upstream O2/Lambda Sensor
    • Intake Temp Sensor
    • Coil On Plug Conversion
    • Clutch [Writeup]
    • Power Steering Removal
    • Bleeding the Cooling System
    • Seafoaming
    • Bleeding Coolant System
    • Heli Coil [How To]
    • Valve Cover Painting
    • Steering Damper Upgrade
  • |Interior DIYs|
    • Instrament Cluster
    • Seat Bushings
    • Interior Light Bulbs
    • Speakers
    • Interior Door handle Cover
    • Stereo Removal
    • Chrome Ring [Gauge Cluster]
    • Steering Wheel [Upgrade]
    • Push Button Start
    • Console Lock Switch
    • Euro Glove Box and Trim
    • Interior Door Pull
  • |External DIYs|
    • HID kits
    • Fog Light Bulb
    • Headlights
    • Door Handle [Painting]
    • Side Mirror
    • Door Handle Gasket
    • Roundel Removal
  • |Suspension DIYs|
    • Front Struts
    • Rear Shocks
    • Sway Bars
    • Brake and Clutch Bleeding
    • Front Brakes
  • |Comments|
  • |Extras|
    • FAQ
    • Diagnosis
    • Specifications
    • Resources
  • |Blogs|
    • Rough Idle Fix
    • The Race to Autocross